
Guides & videos
Getting started and help in the app
Forest Assist guides you inside the app itself, with no network. An eleven-step tour takes you from your first domain to your first export, and each module has its own "?" help.
1. Where to find the guided tour
Three routes lead to it:
| Access | When | What it does |
|---|---|---|
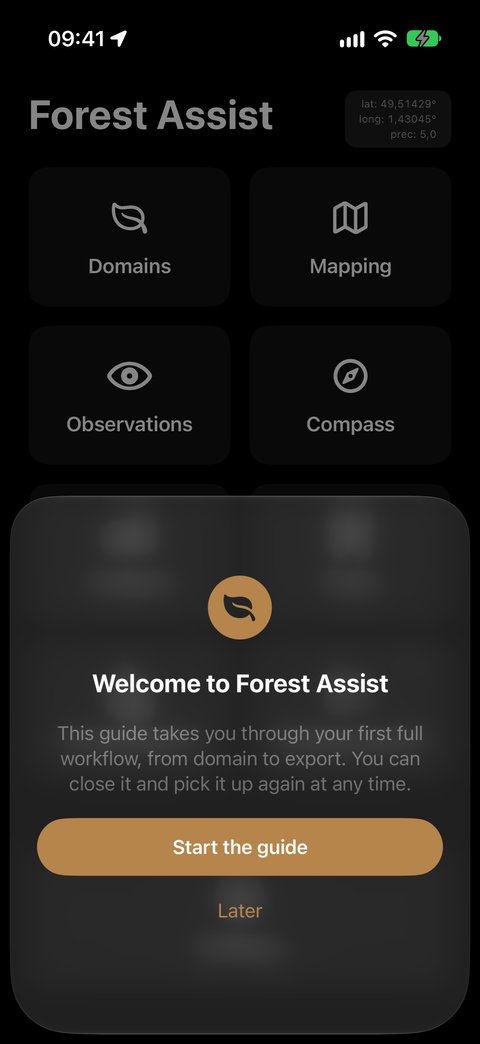
| Welcome to Forest Assist | on first launch, as long as no domain exists | Start the guide opens the tour; Later closes the welcome screen, which does not come back |
| Getting started tile on the home screen | as long as the tour is neither finished nor hidden | opens the tour; its badge shows your progress, for example 3 / 11 |
| Settings ▸ Help ▸ Getting started | always | opens the tour, even if it is finished or hidden |
2. The eleven steps
The tour has three phases. It is designed to last several days: close it whenever you like, and it picks up where you left off.
| Phase | Step | It is ticked when… |
|---|---|---|
| Prepare, at the office | 1. Create your domain | the active domain is placed on the map |
| 2. Draw a parcel | a parcel of the active domain has at least three points | |
| 3. Add a grid to the parcel | this parcel has at least one grid point | |
| 4. Calibrate the relascope | a calibration is saved | |
| Measure, in the forest | 5. Reach a grid point | the Compass brings you within 10 m of the point, or a little more if the GPS is less accurate |
| 6. Create an observation | the active domain has an observation | |
| 7. Survey a plot | a plot has at least one survey with the Timber gesture | |
| 8. Track a tree | a tracked tree has its first visit | |
| Report, back at the office | 9. Read the diagnostic | you open the Diagnostic |
| 10. Export the Word report | the report is created | |
| 11. Export your data | a first export is made |
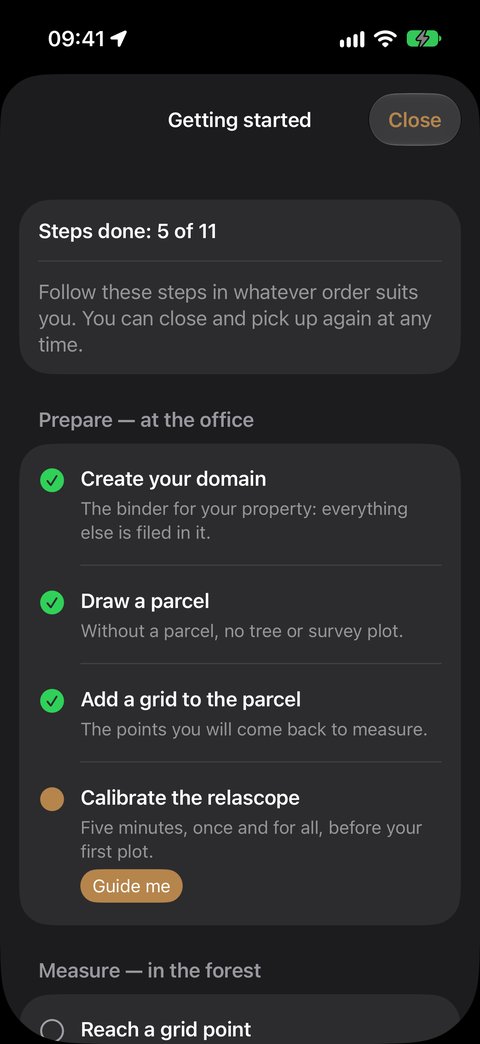
Steps tick themselves off, based on what you do in the app: there is nothing to confirm. A ticked step stays ticked, even if you later delete the data that proves it.
A badge shows the state of each step:
| Badge | State |
|---|---|
| Empty circle | To do |
| Solid circle | In progress |
| Green tick | Done |
| Grey tick | Skipped |
The order is only a suggestion: follow the one that suits you. Only real dependencies count. For example, you need a parcel and an observation to survey a plot. A step waiting for another stays visible, with the note First: followed by what is missing.
3. Acting on a step
Guide me appears on the step in progress. For the other actions, swipe the row to the left, or press and hold it:
| Action | Effect |
|---|---|
| Guide me | closes the tour, opens the right module and shows the tips for the step. If a prerequisite step is missing, that step is the one guided |
| Read the help | opens the "?" sheet of the step's module |
| Skip | sets the step aside: it counts as done in the progress |
| Resume | puts a skipped step back to do |
At the bottom of the screen, Hide from home screen removes the tile; the tour remains available through Settings ▸ Help.
When all eleven steps are done or skipped, the screen shows Getting started complete and the tile disappears from the home screen.
4. The tips
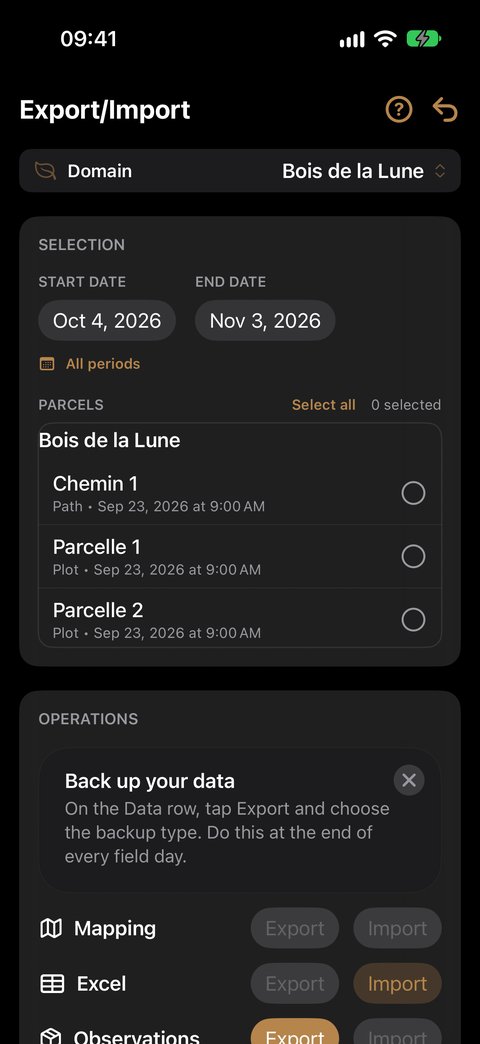
After Guide me, a tip appears near the control to tap and says what to do, in two sentences at most. Others take over as you progress, based on what the screen shows.
Four things to know:
- Only the guided step shows tips. Without Guide me, the app stays as it is.
- A tip blocks nothing: you can tap any other control.
- If a control is greyed out, the tip says why: Plot outside a parcel, New observation when your position matches another domain…
- No tips on a sighting screen. Camera, relascope and augmented reality stay clear: the tip sits on the button that leads there.
The tips for a step disappear as soon as it is done or skipped.
5. The "?" help in each module
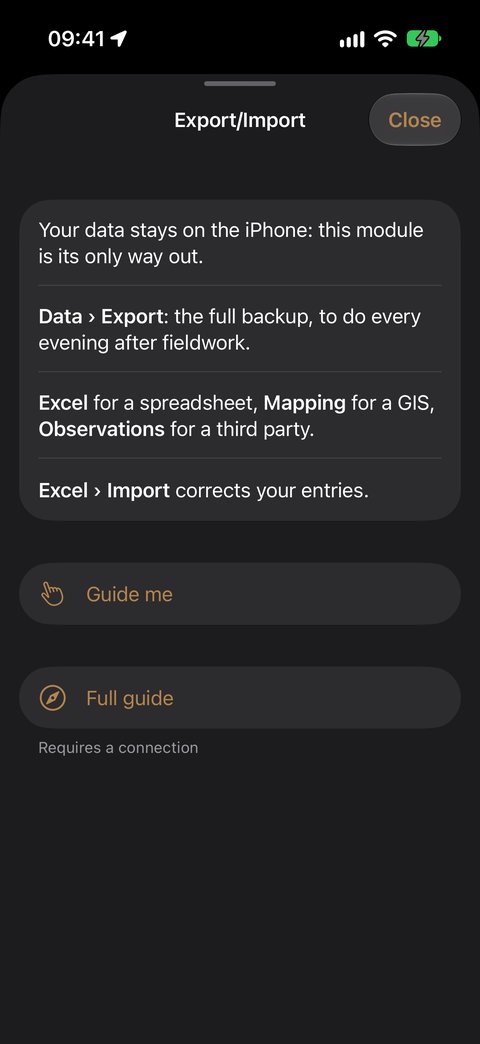
At the top right of each module's main screen, to the left of the ↩ arrow, the ? button opens a short sheet:
- three to five key points, readable with no network;
- Guide me, if a step of the tour remains to be done in this module;
- Full guide, which opens the module's guide on this site in Safari, in the app's language. This link is the only one that needs a connection, and it says so.
| Module | What the sheet says | Full guide |
|---|---|---|
| Domains | what a domain is, creating one, the banner, the analysis settings | Domains |
| Mapping | parcel and path, the two ways of drawing, the grid | Mapping |
| Observations | creating one, free and 1-credit actions, how to proceed with a plot | Observations |
| Compass | flat map and upright sighting, choosing the target, remaining distance | Compass |
| Analysis | period and parcels, Diagnostic, Word report | Analysis |
| Tools | compatible iPhones, distance, diameter and height measurements | Tools |
| Export/Import | full backup, exports by use, corrections from Excel | Export/Import |
| Settings | general settings, relascope, credits, help | Settings |
6. Restarting the guided tour
Settings ▸ Help ▸ Restart the getting started guide resets the tour, after confirmation. The change happens in two stages:
- Straight away: progress starts again and the tile returns to the home screen. Steps your data proves are ticked again at once. Those that rest on an action have to be redone: 5, 9, 10 and 11.
- The next time the app is launched: the welcome screen and the tips come back.
Your data is not affected.
7. What the tour does with your data and your credits
The tour works on your real data: there is no sample domain and no demo mode. The domain and the measurements you enter while following it are yours, and remain so.
The tour itself writes nothing to your data: it opens screens, displays text and remembers its own progress. It works offline.
Steps 7 and 8 use 1 credit each, just as they do outside the tour, out of the 50 free credits. The other steps are free. See Credits.
8. Frequently asked questions
The Getting started tile has disappeared. The tour is finished, or you have hidden it. It remains available through Settings ▸ Help ▸ Getting started.
A step does not tick itself off. Check the banner first: the step is read in the active domain. For step 1, the domain must be placed on the map. For step 5, the target must be a grid point, chosen in the Compass.
Guide me takes me to another step. A prerequisite step is missing: that one is guided first.
I no longer see any tips. Tips only appear for the guided step. Tap Guide me on the step, from the tour or from the module's "?" sheet.
Do I have to follow the tour to use the app? No. If you already know the app, tap Later, then Hide from home screen in the tour.